Composite decking has become a popular alternative to traditional wood decking, thanks to its durability, low maintenance, and eco-friendly qualities. However, to ensure a long-lasting and safe deck, correct installation is key—especially when it comes to fastening the boards. This article will guide you through the essential steps and tips for screwing composite decking the right way.
Why Screwing Composite Decking Matters
While composite decking is designed to last for decades, improper installation can lead to warping, cracking, or even board failure. Screwing down the boards securely not only ensures structural integrity but also improves overall appearance and safety. Unlike wood, composite material expands and contracts more with temperature changes, so the right fastening technique is crucial.

Tools and Materials Needed
Before you begin, gather the necessary tools and materials:
- Composite deck boards
- Stainless steel or coated composite decking screws
- Power drill with adjustable torque
- Screwdriver bits designed for decking screws
- Measuring tape and chalk line
- Spacers (for consistent gaps between boards)
- Safety gear (gloves, goggles)
*Tip: Always use screws specifically designed for composite decking. Standard wood screws can cause surface damage and may not hold as securely.
Choosing the Right Screws for Composite Decking
Not all screws work well with composite decking. Using standard wood screws can cause:
- Mushrooming (material bulging around the screw head)
- Corrosion (leading to rust stains)
- Splitting (if the screw is too thick)
Best Screws for Composite Decking:
√ Stainless steel screws – Rust-resistant and durable.
√ Coated deck screws – Often color-matched to blend in.
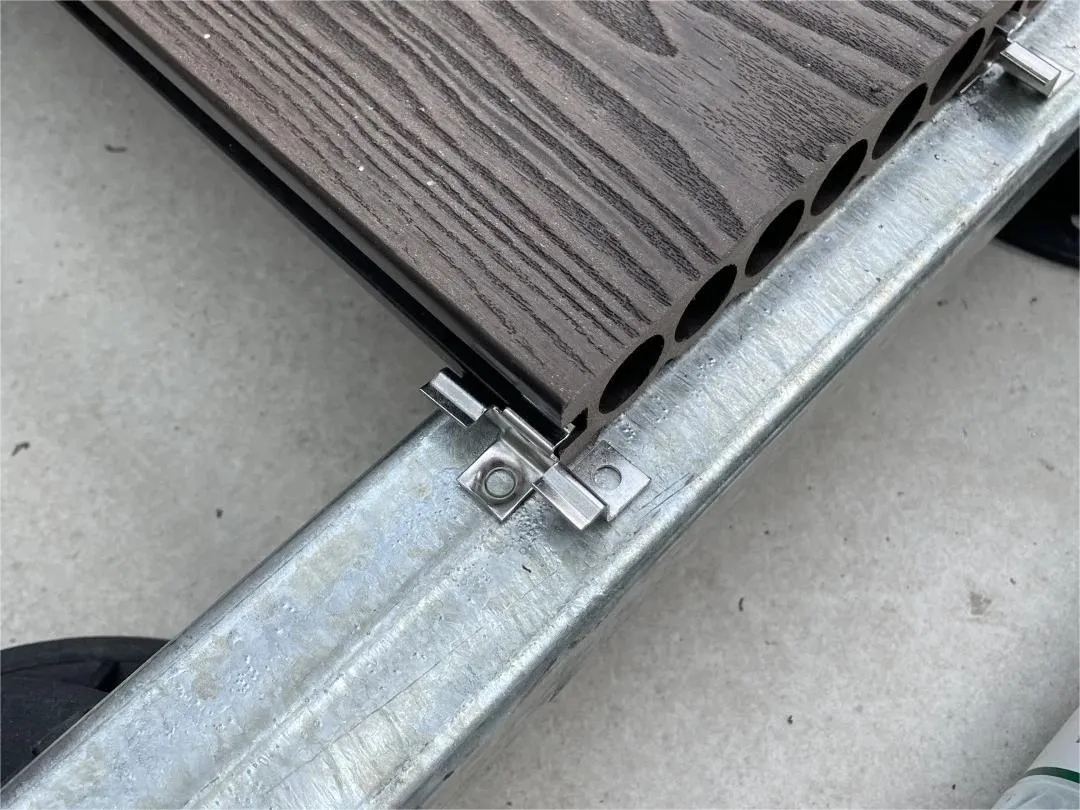
√ Hidden fasteners – Clip systems for a seamless look.
Avoid:
× Galvanized screws (can corrode over time).
× Coarse-thread wood screws (can damage composite material).
Step-by-Step Guide: How to Screw Down Composite Decking
Step 1: Plan Your Joist Layout and Spacing
Proper joist spacing is essential for preventing sagging and ensuring a solid base. For most composite decking brands:
- Joist spacing should be 12″ to 16″ on center.
- For diagonal or angled decking, reduce spacing to 10″ to 12″ inches.
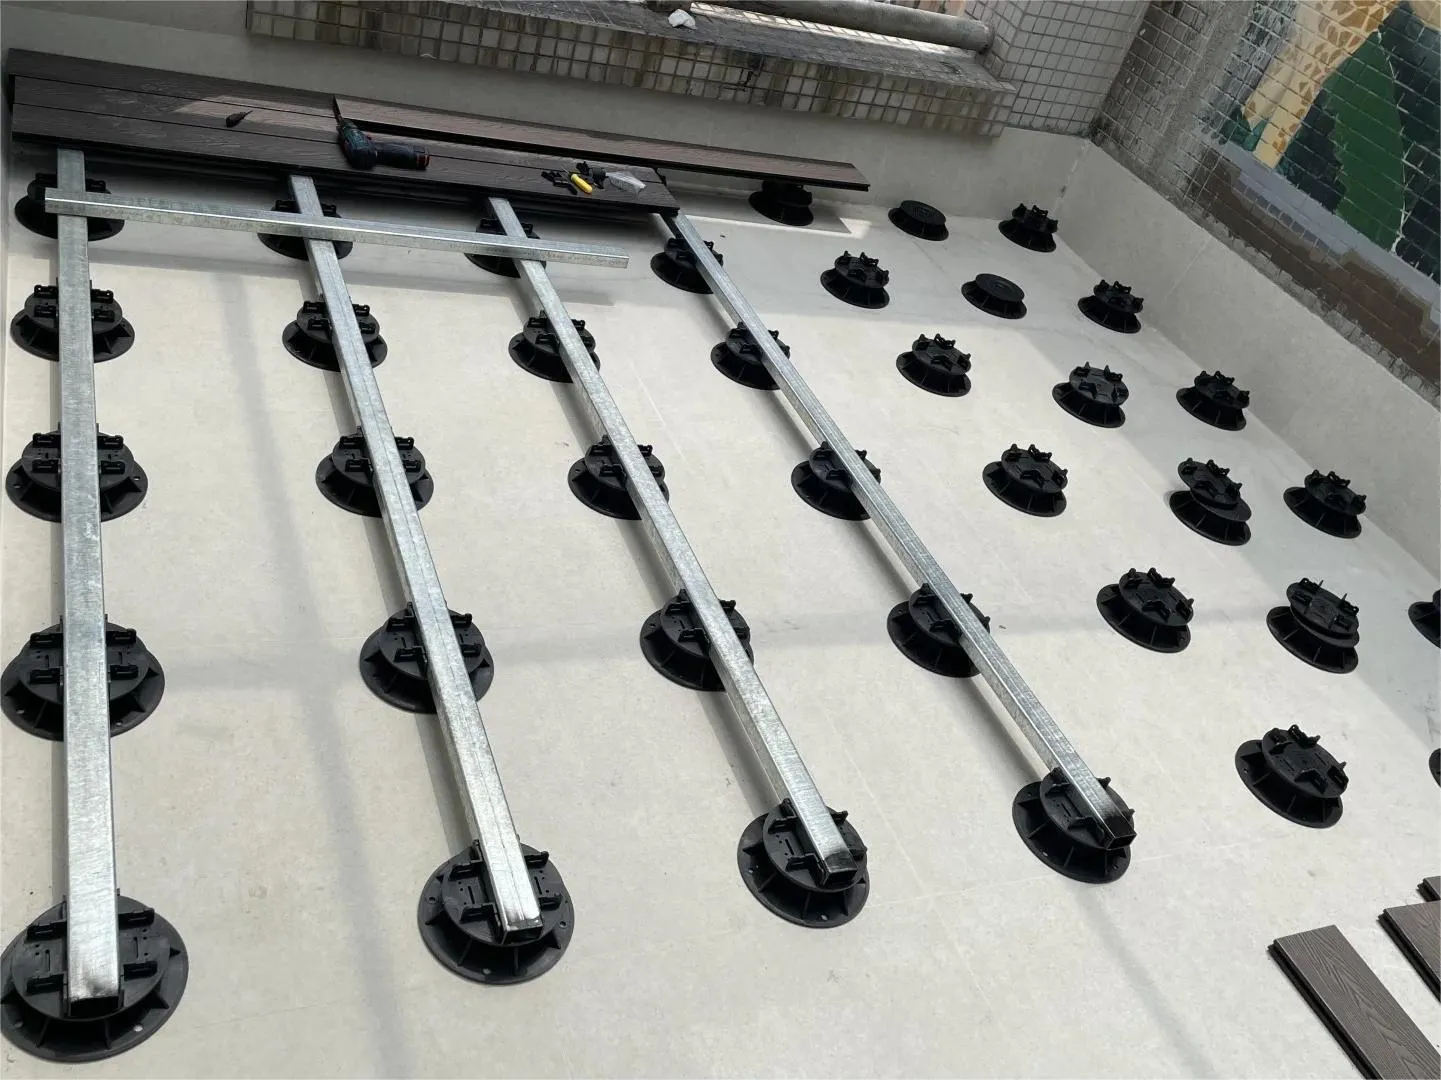
The joist spacing depends on the product and manufacturer guidelines. Closer spacing offers better support and prevents sagging.
Plan your deck board layout in advance. Running boards perpendicular to joists and staggering board ends helps create a cleaner, more stable result.
Step 2: Pre-Drill Holes (if needed)
Although many modern screws are self-drilling, some composite decking brands still recommend pre-drilling pilot holes to prevent surface cracks. Check the manufacturer’s guidelines before beginning. If pre-drilling is required:
- Use a drill bit slightly smaller than your screws.
- Drill into the center of the board, not too close to the edges to avoid splitting.
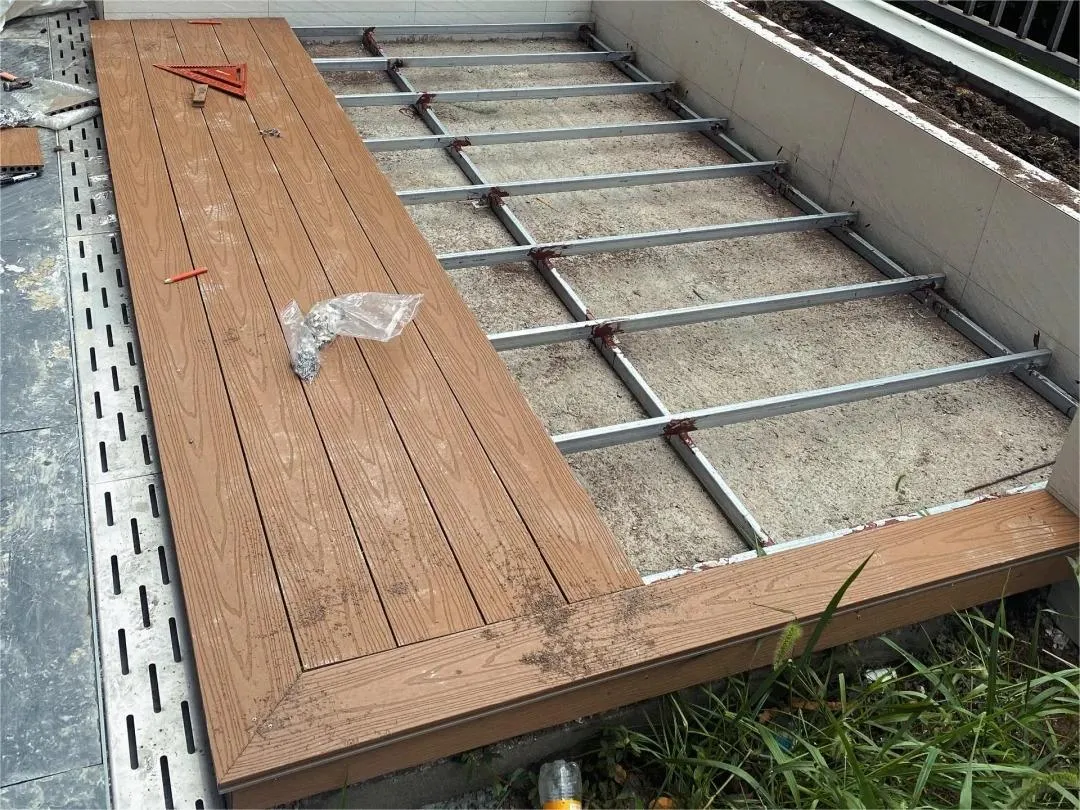
Step 3: Start Screwing Composite Decking Boards
Now you’re ready to install the boards:
- Position the board flush against the starter board or wall.
- Insert spacers between boards to ensure consistent gaps (usually 1/8″ to 3/16″) for drainage and expansion.
- Drive the screw straight down into the board and joist using medium torque.
- Keep screws about 1″ from the edge of the board to avoid cracking.
- Install two screws per joist for each board for maximum stability.
*Tip: For a clean finish, drive the screw head flush with the board surface—don’t over-tighten.
If you feel confused about some steps, here is a detailed step-by-step installation guide of composite decking: How to Install WPC Decking: A Step-by-Step Guide (With Pro Tips)
Step 4: Continue Row by Row
Work your way across the deck in rows:
- Recheck spacing between boards regularly.
- Use spacers to maintain consistent gaps.
- Periodically step back to ensure the boards are straight and aligned.
This step-by-step method ensures even and secure fastening while giving your deck a polished look.
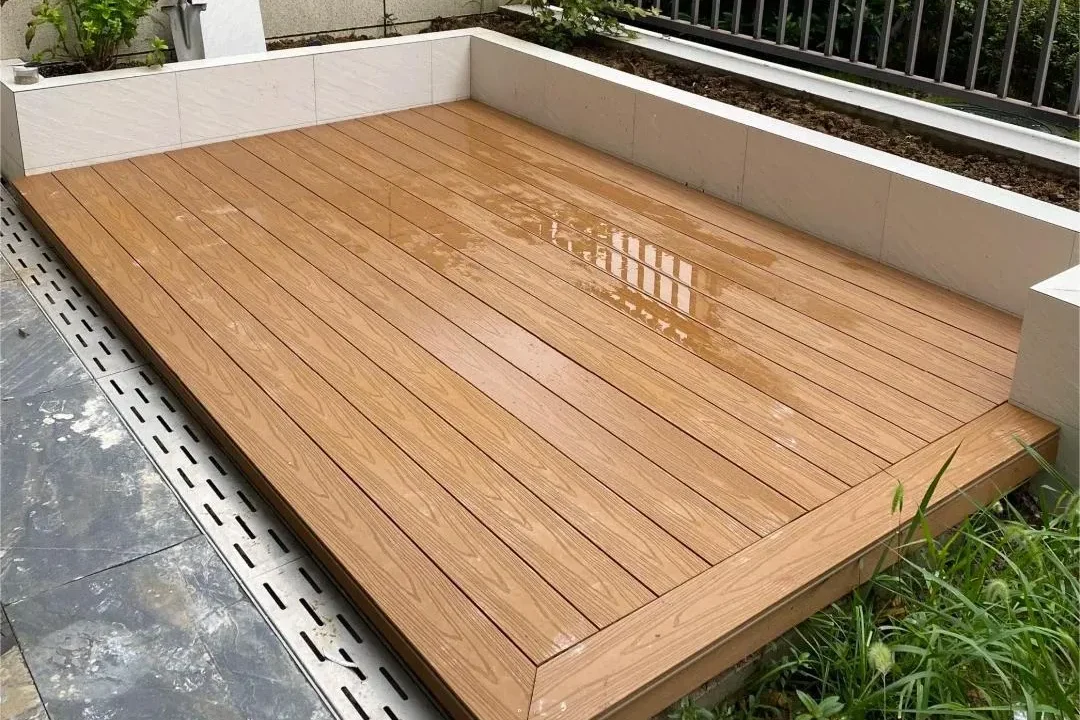
Step 5: Finishing Touches
Once all boards are in place:
- Check for raised screw heads and tighten if needed.
- Trim overhanging boards if required using a fine-tooth circular saw.
- Clean up debris from screw drilling to avoid staining or scratching the boards.
If your deck includes fascia boards or trim, install those last using the same screwing principles.
Tips for Better Results
- Avoid screwing into frozen or overly hot boards as expansion and contraction may distort the screw holes.
- Install boards during mild weather to minimize thermal movement.
- Use hidden fastener systems for a seamless finish (if preferred).
Common Mistakes to Avoid
- Using wood screws instead of composite screws.
- Not allowing for expansion gaps.
- Screwing too close to the edge.
- Ignoring manufacturer recommendations.
Taking time to avoid these errors will save you costly repairs and extend the life of your composite deck.
Conclusion
Screwing composite decking is a straightforward task when done with the right tools, materials, and techniques. By following this guide, you’ll ensure a secure and attractive decking installation that stands the test of time.
Whether you’re a seasoned DIYer or tackling your first decking project, always follow the manufacturer’s installation guidelines to get the best results from your composite materials. If you want to know more about composite decking, you can also read this full guide: Everything You Need to Know About Composite Decking
Want to get more insights on composite decking and eco-friendly home upgrades? visit ecobuildhome.com, where you can find useful maintenance tips, installation guides and buying guides for wood composite and sustainable materials.